My Blog List

Monday, December 6, 2010

Translucent Maple Tuiles - Tuesdays with Dorie/and a TWD Catch-up: The Peanuttiest Blondies


I have to say I don't like the tuiles - they taste too buttery although they do have a nice crunchiness. Mine aren't anywhere near as lacy as the one's in the picture although I baked them for about 7 minutes and put them in the fridge to chill before baking.


To catch up on some of the TWD bakes I have missed (crazy schedule this past couple of months) I made the Peanuttiest Blondies. These are nice - I used a mix of milk and semi-sweet chopped chocolate and they are filled with good goodies. I would say the best baking time in my oven is around 45 mins. (at 40 mins. they were still mushy and at 50 mins. the edges got a bit overdone).

Sunday, November 28, 2010

Daring Bakers - Italian Ricotta Crostata


The 2010 November Daring Bakers’ challenge was hosted by Simona of briciole. She chose to challenge Daring Bakers’ to make pasta frolla for a crostata. She used her own experience as a source, as well as information from Pellegrino Artusi’s Science in the Kitchen and the Art of Eating Well.

I have enjoyed this challenge. It took me a long time to decide on the filling then I got the idea for a traditional Italian ricotta cheese filling from one of the Daring Baker posts. I used version 1 from our challenge for the Pasta Frolla and rolled it into an 8-inch tart pan. It has a lot more sugar and eggs than a pate sucre and was very crumbly; I had to add 2 TBS. of water to the dough to get it together.

I let the dough sit in the refrigerator overnight before rolling it out; it was not such an easy task to roll it as it can get pretty sticky and break off here and there. Maybe pressing the dough in the tart pan with the finger-tips would be an easier, if not better, method as I had to do this with the edges anyway.

This is what I used for the filling, a recipe from "Group Recipes," slightly adapted.

Ricotta Filling
2 pounds ricotta
½ cup sugar
1 Tbs. flour
1/2 teasp. salt
1/2 teasp. vanilla
1 tsp. grated orange zest
4 egg yolks
2 TBS. white raisins, soaked overnight in marsala wine
Pastry cut-outs from the left over pasta frolla


Combine the ricotta cheese with ½ cup of sugar, 1 Tbs. tapioca, ½ teaspoon salt, 1 tsp. vanilla, grated orange peel and egg yolks. Beat until they are thoroughly mixed. Stir in the raisins. Spoon this filling into the partially baked pastry shell spreading it evenly with a rubber spatula. Decorate the pie with the pastry cutouts. Make sure the filling covers the edges of the pastry so the pastry does not get too brown.


Place tart on a tray in the oven then bake on the middle shelf at 350 degrees F for 1 to 1¼ hours or until the crust is golden and the filling is firm. (I baked it for 1 hour and 10 mins.) The almost invisible flower shapes are pastry cutouts I made from the leftover dough.

After baking:
Take the pie from the oven and let it sit on wire rack to cool. Refrigerate for a while. Serve slightly chilled.

Monday, November 15, 2010

Apple Cranberry Galette - Tuesdays with Dorie


I have never made a galette before; it's a wonderful type of pastry to make - so easy and quite pretty, I think, with its pleated border. I used a pizza pan to bake it on, just rolling the dough over the rolling pin and placing the pastry on the pizza pan by unrolling the dough from the pin. The pan also has a natural 1-1/2 inch border so I used it as a guideline for making the folds.


Cranberries alone are a bit tart for my taste so I chose sliced apples and cranberries in a compote, mixed with sugar, water, honey, about 3/4 tsp. of squeezed of lemon juice, and a dash of cinnamon. I got the idea for the compote from Epicurious.


The dough was nice and easy to roll but stuck awfully on the silpat the first time, so that means using a lot of flour. The galette is in the oven right now. Tomorrow I'll get my taste testers' comments.


Later - it's baked perfectly, except some of the fruit on the very top is a bit dry so I am applying some Dr. Oetker's glaze over the fruit.


The verdict today: fabulous pastry but the fruit mix was not liked. It was too sour and needed more sugar. My next fruit galette will not have cranberries; I think my best recipe for apple filling so far is Chef Bo Friberg's in my November 2 post.


Elizabeth of Celestial Confections chose this week's treat. Here's the link to her blog and the recipe: http://celestialconfections.blogspot.com/. Here's to many more galettes! Thanks Elizabeth.


Monday, November 8, 2010

Not-Just-for-Thanksgiving Pear Shortbread Cake - Tuesdays with Dorie


Monday night - I have just finished grating the dough disks and mixing the pear filling in a skillet. The P&Q is just the right place to get great ideas for the weekly Tuesdays with Dorie bake; this week I read about grating dough. It is so much better than trying to get rolled out pastry discs to fit the pan.

For the filling I cut up two large Boscobel pears, quite finely, then added 3 ozs. brown sugar, 1-1/2 TBS. flour, 1 TBS. lemon juice, a dash of ground nutmeg, a dash of ground cloves, and a couple of pinches of salt to a skillet and stirred them a bit, then added the pears. Cooked mixture gently over a medium heat until it started to bubble (it took about 7 minutes to bubble). Now it's cooling - I hope it's not going to make the cake mushy, but here's hoping.

Tuesday and one cake slice later. This is a delicious cake, a bit like a crumb cake in texture but very rich because of the butter. The pear filling is very good and not too sweet. Any stone fruit compote or preserves would be good with this; and apples with some cranberries, but not a whole cranberry filling.
Jessica of "Singleton in the Kitchen" picked this week's treat for us. Thank you, Jessica; it's a great cake. For the recipe check out her blog.
[Note to self: next time leave the freshly grated pastry out on the shelf for about 15 minutes; do not put back in fridge. This way the dough won't be too cold and take about 50 minutes to bake; it should be more like 35 - 40 minutes.]


Tuesday, November 2, 2010

Lemon Meringue Nests and Apple Hand Pies


I've been pretty busy these past two weeks, making pastries for a reception at my church. All in all I prepared around 200 mini pastries; it felt something like a teach yourself pastry school course as I tried a couple of different items I had never made before.

The first pastry was the Meringue Lemon Curd Nests, adapted from a recipe by Chef Gordon Ramsey in BBC Good Food.
Meringue Recipe

3 egg whites
1/2 teasp. lemon juice
3/4 cup of fine sugar (ground regular sugar in the coffee grinder)

Heat oven to 200 degrees F. Tip the egg whites and lemon juice into the clean bowl of a food mixer. Whisk until the whites double in volume and hold a peak when the whisk is drawn through them. Keep the whisk running and add the sugar a tbsp at a time, incorporating completely before adding the next. Whisk until all the sugar has been added and the whites are glossy.
Place a square of baking parchment on a large baking sheet. Pencil 20 circles, about 1-1/2 to 2 inches each, onto the parchment (or place a second sheet of parchment with drawn circles under the top sheet). Spoon the meringue into a 14-inch piping bag fitted with a plain nozzle (no. 3 is a good size) and pipe concentric rounds to fit each drawn circle, piping two or more rings around the edge to form a nest. Place in oven, leaving oven door slightly open by inserting the handle of a wooden spoon it it. Bake for 3 hrs until they are crisp and lift off the paper easily. Leave to cool completely.

Filling
Make lemon curd mixed with whipped cream.
Spoon small amount of the curd-cream into each meringue nest. Delicious!

The next treat was apple hand pies. I used a pie pocket maker 3 inches in diameter to cut the pastry and fill the pies. This is a wonderful tool as it makes really neatly shaped pies.

Apple Filling Recipe
(from The Professional Pastry Chef, by Chef Bo Friberg*)

About 7 Granny Smith apples
10 ounces granulated sugar
1/4 cup water
4 teaspoons lemon juice
Peel and core the apples. Chop approximately 2/3 of the apples into 1/2 inch pieces.
Place the chopped apples in a saucepan with sugar, water, and lemon juice. Adjust the amount of sugar according to the tartness of the apples and your own taste. Stir to combine and cook over medium heat, stirring from time to time, until the apples have broken down and the mixture starts to thicken.
Chop the remaining apples into 1/4 inch pieces and add to the mixture on the stove.

Continue cooking the filling until the apple chunks are soft and the filling has reached a jamlike consistency, adding a bit more water if it seems necessary. Let cool at room temperature, then store, covered, in the refrigerator. Add nuts, or raisins, currants or dried cranberries.

Pastry
Make favorite all butter pastry.
Roll out to about 1/8 inch thick and cut as many rounds as will fit. Sprinkle pie pocket maker lightly with flour. Fill each round of pastry with about a TBS. of apple filling and insert into pie pocket, closing very lightly. Remove apple pastry from pocket. Make a couple of small knife inserts into pie so air can escape while baking. Use egg wash over the top side of each pie.

Bake at 375 degrees F for about 25 minutes or a bit less. (These pies freeze very well, unbaked; when needed they can be baked straight from the freezer.)

Tip: Very important - use only the first round of pastry cut outs - the dough on subsequent rounds will shrink in the the pie pocket and the pies will open while baking. The leftover dough from each first round can always be used for something else.
Work quickly; only cut one circle at a time for each pie. Use needle, not knife for pricking. Use egg wash to help close edges as well as over tops. Must prepare well beforehand so pies can sit in freezer at least overnight.

The reception guests thoroughly enjoyed both these treats - I will be making more of them coming up Thanksgiving visits and Christmas Holiday visits.
*The Professional Pastry Chef:Fundamentals, by Bo Friberg, is an absolutely fabulous baking volume. I would highly recommend it for a treat-yourself purchase.


Monday, October 25, 2010

Daring Bakers - October - Doughnuts


The October 2010 Daring Bakers challenge was hosted by Lori of Butter Me Up. Lori chose to challenge DBers to make doughnuts. She used several sources for her recipes including Alton Brown, Nancy Silverton, Kate Neumann and Epicurious.


I am so excited - my freshly deep-fried doughnuts are cooling off on a rack and I've just consumed one. It is quite delicious, a cakey doughnut, with a half cup of ground unsalted peanuts included in the flour. I'm going to sprinkle finely ground sugar over them just before serving.


Admittedly the deep frying was a bit nerve wracking; I shut the cats in the bedroom (in case they got any ideas about tripping me up in the kitchen) and managed to burn my left index finger with just a spot of hot oil. I'm too nervous to take the pan off the stove until it's all cool - pouring two jugs of iced water in has helped a bit but I'm still not lifting that pan. However, the whole challenge was really fun and not too difficult. I would definitely like to try doughnuts again.


Thank you, Lori. This is a really great pick for our October challenge.


The recipe is from "Chocolate Passion" by Tish Boyle and Timothy Moriarty, slightly adapted, thus:


Peanut Doughnuts

3-1/2 cups cake flour (not self rising)

1 cup unsalted cocktail peanuts

1 cup sugar

2 teaspoons baking powder

1-1/2 teaspoons salt (I cut it to one teaspoon)

3/4 cup whole milk, at room temperature

1 large egg, at room temperature

3 tablespoons vegetable oil

2 teaspoons vanilla extract

vegetable oil for frying


1. In food processor, combine 1/2 cup of the flour with the peanuts. Process for 20 to 30 seconds, until coarsely chopped.

2. In large bowl, using a wire whisk, stir together all the dry ingredients, including the chopped peanut/flour mixture.

3. In medium bowl, whisk together the milk, egg, oil and vanilla extract until blended. Make a well in the center of the flour mixture and pour the milk mixture into it. Using a spatula, stir the mixture until it forms a soft, moist dough. Dust work surface with flour. Scrape the dough onto the work surface and lightly sprinkle the top of the dough with flour. Gather the dough into a ball and knead it gently 5 to 6 times, until smooth. (Do not over-handle.)

4. Dust a large baking sheet with flour. Transfer the dough to the baking sheet. Dust your hands with flour and pat the dough into a circle that is about 11 inches in diameter and 1/2-inch thick. Cover the dough with plastic wrap and place the baking sheet with the dough on it in the freezer for 15 to 20 minutes, until firm.

5. Using a 2-1/4 inch round cookie cutter, cut rounds from the circle of dough. With a floured 1-inch round cookie cutter, cut a hole from the center of each doughnut. Unsing a floured spatula, transfer the doughnuts and the doughnut holes to a waxed paper-lined baking sheet.

6. Gather the scraps of scraps of dough together, wrap in plastic wrap, and refrigerate for 15 minutes. Pat the scraps into a circle 1/2-inch thick and make more doughnuts as above. Cover the doughnuts and refrigerate for up to 6 hours, until ready to fry them. Let the chilled doughnuts stand at room temperature for 15 minutes before frying.


Fry the doughnuts

1. Pour enough oil in a deep-fat fryer or 10-inch, high-sided skillet to come up a depth of 3 inches. Heat the oil to 375 degrees F. Using a spatula or slotted spoon, transfer doughnuts three at a time into the hot oil. Fry one minute at a time on each side (a bit less, I think), until golden brown. Using a slotted spoon, remove the doughnuts from the oil and transfer to paper towels to drain. Set the doughnuts on a wire rack to cool. Fry doughnut holes six at a time, for about 45 seconds each.


Make a chocolate glaze and sprinkle with chopped peanuts, if desired. (I did not do the glaze as I enjoyed the cruller like consistency of the plain, sugared doughnuts.)


Monday, October 4, 2010

Double Apple Bundt Cake - Tuesdays with Dorie


This is a nice, easy, comforting cake to make, the type of cake to prepare in rainy weather or after having a rough day.

I managed to get some apple butter at a supermarket in Brooklyn Heights, however, it's a health apple butter with only apple juice and apple sauce. -I don't go for health foods, but I didn't see a nice, buttery, apple butter alternative. It's very dark and tastes a bit acidic; hopefully it won't spoil the taste of the cake. I used Golden Delicious for the grated apple; and I halved the recipe for a 6-cup bundt cake.

It baked for about 45 minutes and seems to be the right consistency. The smaller bundt cake shape is rather pretty, and should cut into about 8-9 slices if I'm not too generous. I've sprinkled it with caster sugar.

Lynne of "Honey Muffin" chose this week's cake. Thank you, Lynne. I think it's going to be a keeper. Readers will find the recipe here .
The verdict? Some of my taste testers loved it, a couple of others would have preferred it with a ganache or some kind of frosting on top; we had some cream cheese in the refrigerator and one of the guys spread his slice of cake with cream cheese - quite a good idea, I think. I really enjoyed my slice and would say it's a lovely breakfast type cake.

Tuesday, September 28, 2010

Tarte Fine - Tuesdays with Dorie


This is a really nice tart. One of my group quipped that it was "Apple Pizza" and yes, it is in a way, a very delicious pizza. There were very few slices left when I took the picture and that was only 10 minutes after I set the plate out.

I used Granny Smith apples and made some "Rough Puff Pastry" from a recipe in Epicurious. The Granny Smiths were a bit sour so next time I make this I will use Golden Delicious or some other type of sweeter pie apple. The puff pastry came up really well, but it's not that much easier to make than classic puff pastry - it involves grating frozen sticks of butter into the flour in the beginning instead of wrapping some dough around a block of butter, but it still takes 4 turns and lots of refrigeration. (I have discovered a "VahChef" demonstration on u-tube showing what looks like a very good method of making classic puff pastry; it will be nice to give it a try.)

The tangy apricot glaze gave the tart a good finishing touch and I provided a small bowl of cream as well, but most of the group preferred it without cream.

Leslie of Lethally Delicious picked this weeks treat and the recipe is on her blog. Great choice, Leslie! Thank you.


Wednesday, September 22, 2010

Daring Bakers - Decorated Sugar Cookies


The September 2010 Daring Bakers’ challenge was hosted by Mandy of “What the Fruitcake?!” Mandy challenged everyone to make Decorated Sugar Cookies based on recipes from Peggy Porschen and The Joy of Baking.


In keeping with our spring theme, I have chosen some Biblical verses and sugar cookies that suit the season:


11 For, lo, the winter is past, the rain is over and gone;

12 The flowers appear on the earth; the time of the singing of birds is come, and the voice of the turtle is heard in our land...

I think this is one of the loveliest of Biblical passages, from The Song of Solomon, Chapter 2, verses 11-12. I wanted the 16th century English so I copied the passage from my Great-Grandmother's King James Bible. Grannie MacMillan was the Scottish grannie, who came from Motherwell near Glasgow. I like to picture her reading these verses so many years ago.

I ordered copper cookie cutters from Coppergifts.com - a turtle and a flower shape. (I have learned that the turtle was actually a turtledove in Hebrew, but the translators of the KJB read it as a turtle! When I was a child I always used to marvel that the spring could be so wonderful that a turtle could sing.)

Packaged royal icing powder from N.Y. Cake made an excellent outlining and flooding icing and coloring by Chefmaster proved to be the best brand. It gave a deep, dark brown for the turtle markings, without having to add too much liquid. Some of the others, like Wilton, took just too much liquid or powder before they became anywhere near dark enough.

This was altogether an enjoyable project and a good learning experience. I have plans now for Christmas and Easter decorated cookies.

Sunday, September 19, 2010

Cinnamon Raisin Rolls


I'm all gung ho on learning to make sweet yeast breads, hence my effort with raisin buns this week. The recipe is from the "Sunmaid Raisins" website. I adapted it slightly and followed Dorie Greenspan's method in making cinnamon bread - to leave the dough out to rise once it has been formed. I can't imagine why one should put it in the fridge for the first rise, which is the instruction from the Sunmaid recipe! They certainly aren't the best looking of raisin buns but they were a wow with my "taste testers" at work. Obviously I must practice forming them into nice roll shapes.
Ingredients
3/8 cup of milk
6 TBS butter
1/4 cup sugar
1/4 teasp. salt
1/4 cup warm water (110 to 115 F)
1 packet yeast
1/2 egg (beat an egg lightly then measure half of beaten egg in liquid measuring cup)
2 cups flour
1/2 cup brown sugar (light), packed
1 TBS cinnamon
1/2 cup raisins

Method
Check if raisins are nice and moist; if not, steam them for one minute and pat dry.
Lightly beat egg then measure to one half of this.
In saucepan, heat milk; stir in 4 TBS. butter, sugar and salt, stirring until butter melts; cool to lukewarm.
In large bowl, combine warm water and yeast; let sit for 3 minutes then stir until dissolved. (Does not matter if not perfectly dissolved but it must be soft.) Add milk mixture, the beaten egg half and 1 cup flour; beat on low speed for a minute or two in stand mixer with paddle attachment until smooth. Stir in remaining cup of flour to make a soft dough.
Cover; let stand in a warm place until twice the volume. Then cover with plastic wrap and place in freezer for 30 mins. to make the dough firm enough to roll.
Grease 9-inch round pan, buttered. On floured surface, roll dough to 18x8-inch rectangle.
Melt remaining 2 TBS. butter; brush over dough.
Sprinkle dough with the brown sugar, cinnamon and raisins. Starting with longest side, roll up jelly-roll fashion. Pinch edges firmly to seal. Cut roll into 12 slices. Place cut side down in greased pan.. Cover; let rise in warm place (80 to 85 F.) until doubled in size, about 45 minutes.
Heat oven to 375 F. Bake for 25 minutes or until light golden.

Glaze:
1/4 cup powdered sugar
1/2 TBS. butter, softened
1 tsp. milk
1/8 tsp. vanilla extract
Combine all glaze ingredients; brush glaze over rolls while they are still warm.


Tuesday, September 14, 2010

Nectarine Upside-Downer - Tuesdays with Dorie


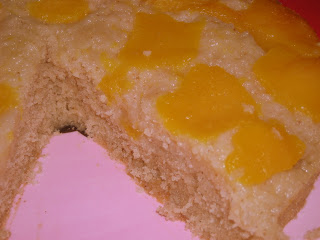
This is my first upside-downer. I chose nectarines for the "topping" - they came out tasting delicious on the cake but I think they must have more liquid than I thought as the base of the cake is a little too soggy. It's rather like a sponge pudding texture. When I can get cranberries I'm going to make this one with cranberries; the Dorie cookbook picture looks so enticing with them.


It's a nice recipe though and so easy to get together. I have set aside a large slice just for me.

Thank you, Sabrina, of "Superfluous" for this week's pick. The recipe is on Sabrina's blog.

Monday, September 6, 2010

Peanut Butter Crisscrosses - Tuesdays with Dorie


These are delicious PB cookies; the flavor is delicate, not too peanut buttery and they are a cinch to make. I did not use any add-ins as I like cookies that are quite classic in a way, and these fit the bill.

I baked them for about 14-15 minutes and they seem to be just right - I've eaten half of the props!
Jasmine of Jasmine Cuisine picked these cookies. For the recipe, check out her lovely blog.


Tuesday, August 31, 2010

Italian Almond Squares


Quick, easy, delicious and great if one needs a Plan B if the first recipe bombs.

Recipe

Yield: 16 squares.
CakeIngredients:
3/4 cups of butter
1 1/2 cups of sugar
2 eggs
1/2 teaspoon salt
1 teaspoon vanilla
1 1/2 teaspoons almond extract
1 1/2 cups of flour
Topping:
1 Tbsp sugar
3/4 cup of SLICED almonds
Procedure
Preheat the oven to 350 degrees. Melt butter. Pour melted butter in a bowl and stir in sugar. Add eggs . Beat mixture at moderate speed with hand mixer, until creamy (about 4 minutes). Add all other ingredients (but not the topping ingredients). Grease bottom and sides of eight-inch square pan. Spread the batter in the pan. Sprinkle the almonds over the top and sprinkle the sugar over the almonds. Bake for about 40 mins, until cake starts to pull away lightly from pan edges.
These were a rave at work, one of the most popular desserts I have made.

Expresso-Chocolate Shortbread Cookies - Tuesdays with Dorie


These are cute side-of-the saucer cookies. The dough is delicate and lightly crunchy; the cookies are well worth making again, with the proviso that I will use a lot less coffee. This is my own personal taste, but I think 1/2 to one teasp. of coffee should suffice to give the chocolate that mocha lift. I found the taste with the exact recipe of 1 Tbs. rather bitter. I'm going to give them a shot next week, with the smaller quantity of coffee (when I make the peanut butter cookies for TWD).
For the recipe, check out Donna's blog: Life's" Too Short Not to Eat Dessert

Sunday, August 22, 2010

Crunchy and Custardy Peach Tart - Tuesdays with Dorie


Rachel of Sweet Tarte picked this lovely tart for us. It's a great choice - thank you, Rachel. The recipe is on the Sweet Tarte blog.

Dorie's Sweet Tart Dough has become a staple for my baking - I use it for lemon curd tartlets, fruit tarts, and so on and so on. Why use anything else! I just made the plain recipe for this tart, without the almonds (I'll try that some other time).


I used my rectangular tart pan, just for a change - it's roughly, very roughly, the same area measurement as my 9 inch circular pan and the single portion of the dough fits very nicely. It's also easier to cut than a circular tart. I bought luscious, ripe, yellow peaches from my local store and had fun slicing and fitting them into the pan. The custard filling was easy. The only thing I was a bit disappointed in was the streusel - it came out looking rather lumpy; obviously my streusel making skills are not yet up to par.
They loved it at work - I had to go out of the office for the morning; when I came back it was all gone, with only a few crumbs left. It always gives me a lift when the group enjoys the Tuesday treat. Now I'm sold on using peaches in baking - maybe in individual tarts next time, with some brown caster sugar over them, or in a nice fresh fruit cake.
So onward to next week's Chocolate Shortbread.


Tuesday, August 17, 2010

Pistachio White Chocolate Biscotti


These are the biscotti I baked for the co-workers for their Tuesday treat. The recipe is Dorie Greenspan's, adapted to include pistachio nuts and anise essence and dipped with tempered white chocolate.


They were delicious and got a thumbs up at work. I had a bit of a hard time doing the baking in the heat - yesterday was quite wicked and my kitchen gets very hot, so the dough was difficult to handle and had to be put in the fridge before shaping into the logs.


I have tempered white chocolate successfully before but that was in May; this time it didn't temper properly and remained a bit sticky. The temperature on the chocolate thermometer was supposed to go no higher than 110 degrees F, then down to 84 degrees and finally up to 87 (according to the instructions I used). But it shot up to well over 110 degrees, which, I think, is white chocolate tempering doom. For my next effort I'm going to heat the chocolate as the water in the double boiler base is heating, not wait until it's simmering. That way I should have more control.


Dorie's recipe is here: (I've just realized I have made this four times and posted about it three times - oh well, it must mean I really like it.
Pistachio White Chocolate Biscotti
adapted from Baking From my Home to Yours by Dorie Greenspan
Biscotti
1 1/2 cups of flour
1 1/2 teaspoons of baking powder
1/4 teaspoon of salt
1/2 cup of yellow cornmeal
8 tablespoons of unsalted butter, softened
1 cup of sugar
2 large eggs
1 1/2 teaspoons of anise
3/4 cup of pistachios, medium-size chopped.
1. Preheat the oven to 350F. Line a baking sheet with parchment paper.2. Whisk the flour, baking powder, salt and cornmeal together. (If you are adding ground spices, add them to this mixture before combining.)3. Beat the butter and sugar together at medium speed for 3 minutes, until very smooth. Add the eggs and continue to beat, scraping down the bowl as needed, for another 2 minutes, or until the mixture is light, smooth and creamy. Beat in the almond extract. Reduce the mixer speed to low and add the dry ingredients, mixing only until they are incorporated. You'll have a soft, stick-to-your-fingers dough that will ball up around the paddle or beaters. Scrape down the paddle and bowl, toss in the pistachios and mix just to blend.4. Scrape half the dough onto one side of the baking sheet. Using your fingers and a rubber spatula or scraper, work the dough into a log about 12 inches long and 1 1/2 inches wide. The log will be more rectangular than domed, and bumpy, rough and uneven. Form a second log with the remaining dough on the other side of the baking sheet.5. Bake for 15 minutes, or until the logs are lightly golden but still soft and springy to the touch. Transfer the baking sheet to a rack and cool the logs on the baking sheet for 30 minutes.6. Using a wide metal spatula, transfer the logs to a cutting board and, with a long serrated knife, trim the ends and cut the logs into 3/4-inch-thick slices. Return the slices to the baking sheet, setting them again on the same sides as before and slide the sheet back into the oven.7. Bake the biscotti at 350F for another 15 minutes, or until they are golden and firm. Transfer them to racks and cool to room temperature. These are very nice indeed. (The baking time might need to be a little longer but the biscotti must not get too brown on the underside.)
White Chocolate: Temper one pound of good quality white chocolate (I used Callebaut) and let cool before dipping biscotti.

Monday, August 9, 2010

Raisin Cake with Cream Cheese Frosting


I wanted something quick, easy and which did not require a long baking time. Once again we suffer in NY with sticky, airless weather. I came across this recipe from About.com (often an excellent site for baking). These are the full measurements; I halved them and used an 8-inch square pan.

Raisin Cake:
2 cups flour
1-1/2 cups sugar
1-1/2 teaspoons baking soda
1 tablespoon cocoa
1 teaspoon cinnamon
1 teaspoon salt
1 teaspoon nutmeg
1 teaspoon allspice
1/2 cup vegetable oil
1 cup applesauce
2 eggs, at room temperature, lightly beaten
1-1/2 cups raisins

Frosting: (I also halved this).
8 ounces cream cheese, softened
1 teaspoon vanilla extract
2-1/2 cups confectioners' sugar
1 tablespoon fresh lime juice (or lemon)
Milk, as needed (did not need, in fact needed a bit more confectioner's sugar)

Preparation:
Pour hot water over raisins to cover. Let steep until plump, about 15 minutes, then drain thoroughly. Preheat oven to 350 degrees. Line a 9 x 13-inch pan with non-stick foil. In large bowl, whisk together flour, sugar, baking soda, cocoa, cinnamon, salt, nutmeg, and allspice. Make a well in the center. Add oil, applesauce and beaten eggs. Mix well. Fold in plumped raisins. Pour into pan and bake for 30 to 35 minutes. (My smaller cake was done around 25 mins.) Cool to room temperature. Frosting: In small bowl, beat cream cheese until smooth. Add vanilla extract and confectioners' sugar. Add lemon juice and just enough milk to make frosting smooth and easy to spread. Smooth frosting on top of cooled cake. Refrigerate cake for 1 hour. (overnight)
This proved to be a great hit; it's a very nice snack cake and the apple sauce and oil made it wonderfully moist. I'll definitely make this for other occasions besides the office Tuesday treat.

Wednesday, August 4, 2010

Nut Sponge Cake

.

I really like this recipe - it's quite rich and delicate in texture and the flavors blened in very well. I used a thin layer of apricot jam and whipped cream for the filling; this is a cake which could take a variety of fillings: creme anglaise would be lovely, as would a mascarpone cheese frosting filling, and so on and so on. I sprinkled the top with caster sugar.

Nut Sponge Cake with Jam and Cream

4 oz. butter
4 oz caster sugar
2 eggs, separated
1-1/2 oz roasted ground hazelnuts
4 oz self raising flour
Pinch of salt
1 teaspoon instant coffee
1 tablespoon warm milk

Set oven at 375 degrees F. Grease and line a 8-inch round cake tin. Soften the butter in a bowl, add the sugar and beat until fluffy. Add the egg yolks, nuts, sifted flour and salt. Dissolve the coffee in the milk and add to the mixture; then fold in the stiffly beaten egg whites. Turn into the tin and bake for about 25 minutes until firm and a skewer inserted comes out clean. Turn out on to a wire rack and leave to cool. Fill with filling of choice.

Monday, August 2, 2010

Gingered Carrot Cookies - Tuesdays with Dorie


I'm wondering if there are photo lessons for Dummies, like the Dummy series books - I got this pic quite nicely because by chance the camera was in image mode. Must learn, must improve!
I have to say I didn't like these cookies very much; they were okay just baked but later they turned soft and did not seem to have that much flavor. But that's just my taste; a lot of TWD'ers did like the recipe.
Anyhow, they're up and posted.

Saturday, July 24, 2010

Chewy Chunky Blondies and a Catch-up: Lots of Ways Banana Cake - Tuesdays with Dorie


First, the Blondies. Umm....! Chocolate, coconut, butterscotch chips, a combination not to be resisted, plus a chance to make some blondies, which I have not made before.
I halved the recipe and used an 8-inch square pan. Baking time was about 43 minutes. The top has a nice crust on it, quite flaky. Unfortunately quite a few cracks appeared when I flipped the cake onto the second tray; oh well, I think it's going to taste good even though it looks a bit like paving stones.
The recipe is here on Nicole's blog. Thank you, Nicole - it looks like a really good choice.
The Banana Cake was due last Tuesday but I had problems with unripe bananas. This time I had two beautiful, speckled bananas for the cake (also using half the recipe), so here it is. It's an easy cake to get together and I was grateful that I did not have to spend too much time in the kitchen, while NY is reaching record high temperatures and humidity.
This is another 8-inch square cake; I halved Dorie's recipe and baked it for just over 35 minutes. I'm going to keep it simple and just sprinkle some caster sugar over the top - the weather is too hot and sticky to think about frosting.
The recipe is on Kimberley's blog, here. It was an excellent choice.

Monday, July 19, 2010

Lemon Sheet Cake with Lemon Glaze


No Tuesdays with Dorie Banana Cake yet - I have some not ripe enough bananas hopefully ripening in the kitchen; I'll make the cake when the bananas get brown spots.

I wanted something easy, cool and quite plain as the heat is unbearable here, so I chose a lemon sheet cake - no frosting, just a glaze, a dollop of cream and an oven temp. of only 325 degrees F. Here's the recipe:


Lemon Sheet Cake with Lemon Glaze (from Texas Cooking website)

2 cups all-purpose flour
2 teaspoons baking powder
1/2 teaspoon salt
1/2 cup butter (1 stick), at room temperature
1-1/2 cups sugar
1 teaspoon vanilla extract
finely grated zest from 2 lemons
4 eggs plus 2 egg yolks
1 cup buttermilk

Preheat oven to 325°F. Grease and flour a 13x9x2-inch baking pan. Sift together the flour, baking powder and salt, and set aside. With an electric mixer, beat the butter at medium-high setting for 2 minutes. Add the sugar gradually, beating for 5 to 6 minutes. Add the vanilla extract and lemon zest and beat until incorporated. Add eggs and egg yolks, one at a time, beating well after each addition. Turn mixer speed to low and add the sifted flour mixture alternately with the buttermilk. Scrape down sides of mixer bowl as needed, and beat until the batter is uniformly smooth. Pour batter into prepared pan, and bake for just under 50 minutes or until the sides begin to pull away and a sharp knife dipped comes out clean. Remove cake from oven and turn on to cooling rack.

Make the glaze:

juice from 2 Lemons
1/3 cup plus 1 tablespoon sugar
1 tablespoon light rum

Mix all ingredients and stir well several times until sugar is dissolved. When the cake has cooled for about 10 minutes, brush the surface with the glaze using a pastry brush. Use all the glaze.
This is indeed a wonderful cake, a great success. It has a light lemon flavor in the base of the cake yet the glaze is delightfully tangy. This was a hit at work. It's an ideal cake for a crowd - two or three batches would bake up beautifully for a reception or a party. Even without the cream it is delicious and would do nicely for an outdoor event.

Sunday, July 11, 2010

Brrrrr-ownies - Tuesdays with Dorie


How nice to only have to spend about 15 minutes in the kitchen getting these together. They are quick and easy to make. It is so outrageously hot here in NY that it's difficult to think of doing anything at all except staying close to the air conditioner.

I'm excited about this recipe; I cut the York Peppermint Patties into 1/8ths and placed them on a layer of the batter, covered by the remaining batter. I'm hoping that way they won't get too gooey.

Well, they are indeed pretty ugly - there are bumps of peppermint chocolate sticking everywhere and it was a battle prizing the foil off the bottom. A pretty ugly picture too. But, beauty is not everything. They are amazing! I had such a nice treat of two brownies when I came home this evening - cool and chewy, straight out of the refrigerator.

Now I can't wait to take them to work tomorrow.

The recipe is on Karen's blog, here. Thanks, Karen; it's a super choice.

Saturday, July 10, 2010

Betty Crocker's Peanut Butter Cookies


I'm always searching for nice, traditional American cookies to send to our Troops in the Middle East (I belong to the Baking Gals group). What could be more traditional than Betty Crocker peanut butter cookies!

These cookies are delicious; sweet (but not too sweet) and with a light, quite delicate texture. I used crunchy peanut butter, which gave them a nice munch/crunch quality. I'm mailing them tomorrow, with some other "traditionals" as well - cocoa drop cookies and coconut cookies. I'm am told that our troops really appreciate the packages the Baking Gals group sends them; I try to make a batch every month.
If you would like more information on the Baking Gals, check us out at http://www.bakinggals.com

Recipe - Peanut Butter Cookies
1/2 cup granulated sugar
1/2 cup packed brown sugar
1/2 cup peanut butter
1/4 cup shortening
1/4 cup butter or margarine, softened
1 egg
1 1/4 cups Gold Medal® all-purpose flour
3/4 teaspoon baking soda
1/2 teaspoon baking powder
1/4 teaspoon salt

1. Mix sugars, peanut butter, shortening, butter and egg in large bowl. Stir in remaining ingredients. Cover and refrigerate about 2 hours or until firm.
2. Heat oven to 375ºF.
3. Shape dough into 1 1/4-inch balls. Place about 3 inches apart on ungreased cookie sheet. Flatten in crisscross pattern with fork dipped into sugar.
4. Bake 9 to 10 minutes or until light golden brown. Cool 5 minutes; remove from cookie sheet. Cool on wire rack.

Tuesday, July 6, 2010

Tarte Noire (or Tart with Milk Chocolate) - Tuesdays with Dorie


It's a 7-inch tart with Lindt milk chocolate filling, topped with some toasted hazelnuts. I'm looking forward to a thin slice. I have not yet found a better sweet dough recipe than Dorie's; it's so easy to make and never fails, unless it's overbaked like my first effort this week. (I forgot to freeze the tart before popping it in the oven and did not cover it enough with the foil, so the end result was tart edges that tasted quite burned and a brownish looking base.)

On to the next effort. This tart was much better - I kept it in the freezer overnight before baking it, fully covered the frills with foil and baked it for only 15 minutes before removing the foil and baking it open for about 7 minutes. It's come out very nicely.

Now the filling - I also had two goes at this; the first, where I halved the cream, chocolate and butter exactly, was way too liquidy. My second attempt had only 1/3 cup cream so it has come out nice and glossy with a firm consistency. I'm keeping it in the fridge overnight - the weather is so steaming hot here in New York I don't want to leave anything out on the table.

The recipe is posted here.

Monday, June 28, 2010

Rum-Drenched Vanilla Cake - Tuesdays with Dorie


My Rum-Drenched cake has a little bit of a history - in my eagerness to work with small pans I initially baked half the portions in a small loaf pan; it rose way above the level of the pan and I didn't bake it for long enough. The next morning there was a pale, gummy loaf sitting on the table. So I will have to be careful with my size experiments. I read only glowing reviews of the cake in the P&Q so I gave it a second shot. This time I halved the recipe again but baked it in the recommended 8-1/2x4. I also reduced the amount of sugar to about 7/8 of one cup. Tomorrow will be the taste test when I will find out if my second attempt is a success. For the recipe, check out Wendy's blog at Pinkstripes. Thank you, Wendy.

Sunday, June 27, 2010

Dressy Chocolate Loaf Cake - Tuesdays with Dorie


I'm sneaking the Dressy Chocolate Loaf Cake in a week late - it was almost ready to make for last Tuesday, that is, the dry ingredients were sifted and sitting in a bowl on the kitchen table. But I ended up coming home late so I did easy shortbread cookies instead. Now is my chance to catch up.

I have the ambition to make small cakes like the stunning presentations that one sees in shops like Citarella - little comma cakes with mirror glazes, small cylindrical opera cakes, and so on. I just stand at the counter and gaze at the beauty; fortunately the staff are used to me and don't seem to mind if I don't purchase a cake. I'm a long way off from reaching my goal but as long as I enjoy myself along the way I guess that's good. Today's cake is a half-size - I used a 5x5x3 inch square pan that I purchased at New York Cake..

I was very worried at first as the cake looked as if it would be permanently sunk in the middle; however, after 45 mins. at 325 F it rose beautifully. I was advised to use 325 F for chocolate cakes generally (my Baking 911 club)and it seems to have worked very well.

Cream Cheese frosting from "More from Magnolia" on top and some cherry jam in the middle are the dressy components of this lovely chocolate cake recipe.

The recipe is on Amyruthbakes.

Pavlova - Daring Bakers


The June 2010 Daring Bakers’ challenge was hosted by Dawn of Doable and Delicious. Dawn challenged the Daring Bakers’ to make Chocolate Pavlovas and Chocolate Mascarpone Mousse. The challenge recipe is based on a recipe from the book Chocolate Epiphany by Francois Payard

Here's my Daring Bakers' Challenge Pavlova. One comment I got was "awesome" while another was it was good but that it would be more appropriate for an after-dinner dessert (I served them in the morning at work).

My own feelings - the mousse and creme anglaise are indeed awesome - there was quite a lot of mousse left over so I had some large spoonsful just for me. But I was disappointed in the meringue - it was way too hard; I like meringues to be soft-centered and puffed up high. Made with puffy meringue this dessert would be fabulous.

I'm all in gear for trying Audax's tradional Aussie Pavlova when it's not so humid, as it is here in NY at the moment. All in all, an exciting and challenging challenge in which I got to make desserts which I had never made before.

Thank you Dawn for a great project.

Tuesday, June 22, 2010

Lemon Sables - Cooks' Illustrated


Lemon Sables


I made these for the weekly co-worker treat. The recipe is from Cooks' Illustrated and has an interesting twist to it - hard boiled egg yolk is used in place of uncooked egg yolk. The reason given is that this will give a more sandy, crunchy texture to the sables. Well, they were delicious anyway - I'm not sure if the egg yolk thing made that much of a difference. I may well use this method again, but boil two large egg yolks, weigh the first, then keep some of the other one to make up any loss of yolk when putting the first one through the strainer.

Recipe:

Make sure the cookie dough is well chilled and firm so that it can be uniformly sliced. After the dough has been wrapped in parchment, it can be double-wrapped in plastic and frozen for up to 2 weeks.

Ingredients
1 large egg
10 tablespoons (1 1/4 sticks) unsalted butter , softened
1/3 cup plus 1 tablespoon granulated sugar (2 3/4 ounces)
1/4 teaspoon table salt
1 teaspoon vanilla extract
4 teaspoons grated lemon zest (I used 3 teasp. as I did not want it too lemony.)
1 1/2 cups unbleached all-purpose flour (7 1/2 ounces)
Confectioners' sugar

Instructions
1. Place egg in small saucepan, cover with 1 inch water, and bring to boil over high heat. Remove pan from heat, cover, and let sit 10 minutes. Meanwhile, fill small bowl with ice water. Using slotted spoon, transfer egg to ice water and let stand 5 minutes. Crack egg and peel shell. Separate yolk from white; discard white. Press yolk through fine-mesh strainer into small bowl.

2. In bowl of stand mixer fitted with paddle attachment, beat butter, granulated sugar, salt, and cooked egg yolk on medium speed until light and fluffy, about 4 minutes, scraping down sides of bowl and beater with rubber spatula as needed. Turn mixer to low, add vanilla and lemon zest, and mix until incorporated. Stop mixer; add flour and mix on low speed until just combined, about 30 seconds. Using rubber spatula, press dough into cohesive mass.

3. Divide dough in half; roll each piece into log about 6 inches long and 1 3/4 inches in diameter. Wrap each log in 12-inch square of parchment paper and twist ends to seal and firmly compact dough into tight cylinder (see illustrations below). Chill until firm, about 1 hour.

4. Adjust oven racks to upper-middle and lower-middle positions and heat oven to 350 degrees. Line 2 rimmed baking sheets with parchment paper. Using chef’s knife, slice dough into one-quarter-inch-thick rounds, rotating dough so that it won’t become misshapen from weight of knife. Place cookies 1 inch apart on baking sheets.

5. Bake until centers of cookies are pale golden brown with edges slightly darker than centers, about 15 minutes (mine took 20 mins.), rotating baking sheets front to back and top to bottom halfway through baking. Cool cookies on baking sheet 5 minutes; using thin metal spatula, transfer cookies to wire rack and cool to room temperature. Once cookies have cooled, dust with confectioners' sugar. Store cooled cookies between sheets of parchment paper in airtight container for up to 1 week.

After tasting and comparing - These cookies are definitly more crunchy and sandy than those with an uncooked yoke as an ingredient. It seems the more uncooked yoke (two in my next trial) the more the cookies become like delicious butter biscuits but very, very light. Both kinds are good.

Sunday, June 13, 2010

Raisin Swirl Bread


This is something new for me - I have only made a couple of yeasted bread recipes up to now. I've quite often used a bread machine for baking bread (perhaps the equivalent of a cake maker using a cake mix instead of the real thing). Now I feel rather thrilled that I have actually made real bread, using the dough hook of course, not kneading by hand. Maybe kneading will be my next progression.

This is a lovely recipe, with such clear instructions for the various stages of baking. It came out nice and soft. I made cinnamon-raisin rolls instead of the regular loaf. Only thing is they got a bit distorted and uneven in shape, maybe because they needed more room to expand (I used a 9-inch square baking pan and stuffed 12 rolls in it).

This recipe makes a light, quite plain, not really sweet loaf, ideal for eating with butter or cream cheese. I expected it to be sweeter but it was a rave in the office; the large bag of rolls vanished early in the morning.

Susan of Food.Baby picked this recipe. I will definitely make it again, probably in a regular loaf pan. Great choice. The recipe is on Susan's blog.

Monday, June 7, 2010

Tender Short Cakes - Tuesdays with Dorie


These were a huge success! I am feeling quite proud of myself for making something really new - I have never made shortcakes before (or biscuits or scones)- Opera cake yes, but shortcakes no. They tasted delicious with the cream and a cherry compote I cooked up; one of my co-workers liked the plain shortcake as is, saying it made an excellent breakfast cake to have with his coffee.

I made a half quantity which gave eight large cakes. Although I'm feeling really good about them, I think I still need some practice in getting them light. We had them the next day and they were a little bit dense. I thought the dough was quite dry when making it, even with adding another 2 Tbs. of cream.

I thought the compote was good too; it's from My Recipes website. I used half quantities here as well. It was not too sweet.

Compote:
4 cups pitted sweet cherries (about 1 1/2 pounds)
1/4 cup granulated sugar
2 tablespoons water
2 teaspoons cornstarch
1/4 teaspoon almond extract

To prepare compote, combine cherries, 1/4 cup granulated sugar, 2 tablespoons water, and cornstarch in a medium saucepan; bring to a boil. Cook 1 minute, stirring constantly. Remove from heat; stir in extract. Cool. Serve with shortcake.

Cathy of The Tortefeasor picked this one for us. It was a wonderful choice. Thank you, Cathy.

Monday, May 31, 2010

White Chocolate Brownies - Tuesdays with Dorie


Looking good - I've just taken them out of the oven. Billows of lightly browned meringue are covering the brownies, which seem to have pulled nicely away from the sides. I made half quantities, except for the meringue, which I kept at the full quantity, and used an 8" square cheesecake pan with a removable base. This way I would not have any problem getting them out of the pan. I baked them for 35 minutes and used blueberries instead of raspberries.

The verdicts at work: Some raved, some said they were a bit too sweet. I think I would probably use only half the recommended sugar portion in the meringue next time. On the whole, a success - I liked them very much, being a sweet tooth. This posting will be a day late; all a matter of not being able to find my camera/computer connection due to an early summer cleaning frenzy in my apartment. I took a pic at work and will use that one.

Marthe of Culinary Delights selected these white chocolate brownies. Thanks Marthe - it's a keeper. Check out Marthe's blog for the recipe.

Tuesday, May 25, 2010

Piece Montee - Daring Bakers May Challenge


The May 2010 Daring Bakers’ challenge was hosted by Cat of Little Miss Cupcake. Cat challenged everyone to make a piece montée, or croquembouche, based on recipes from Peter Kump’s Baking School in Manhattan and Nick Malgieri.

I loved making the profiteroles and the creme patisserie; just seeing the profiteroles all puffed up and crunchy when taken out of the oven and tasting the silky pastry cream gave me a sense of achievement. I made the vanilla pastry cream so can't wait to make a dessert with the chocolate version. I used melted Callebaut white chocolate to drizzle over the profiteroles - it came out a bit chunky looking as I put my "work of art" in the fridge overnight.

I bought a 6-inch foam cone at an arts and crafts shop for a few dollars, so did not bother with making a cardboard cone, then I used toothpicks to attach the pastries to the cone. I did not enjoy this part so much - certainly need a lot of practice as it came out a bit wonky looking.

I took the filled pastries (without the cone!) to work - so true what the recipe says; this dessert must be eaten fresh; by the time we were ready to consume them they were a bit soggy. Next time I'll make them (or cream puffs) at home, for guests at home.

Here's the main recipe section:

Ingredients:

For the Vanilla Crème Patissiere (Half Batch)
1 cup (225 ml.) whole milk
2 Tbsp. cornstarch
6 Tbsp. (100 g.) sugar
1 large egg
2 large egg yolks
2 Tbsp. (30 g.) unsalted butter
1 Tsp. Vanilla

Dissolve cornstarch in ¼ cup of milk. Combine the remaining milk with the sugar in a saucepan; bring to boil; remove from heat.

Beat the whole egg, then the yolks into the cornstarch mixture. Pour 1/3 of boiling milk into the egg mixture, whisking constantly so that the eggs do not begin to cook.

Return the remaining milk to boil. Pour in the hot egg mixture in a stream, continuing whisking.

Continue whisking (this is important – you do not want the eggs to solidify/cook) until the cream thickens and comes to a boil. Remove from heat and beat in the butter and vanilla.

Pate a Choux (Yield: About 28)
¾ cup (175 ml.) water
6 Tbsp. (85 g.) unsalted butter
¼ Tsp. salt
1 Tbsp. sugar
1 cup (125 g.) all-purpose flour
4 large eggs

For Egg Wash: 1 egg and pinch of salt

Pre-heat oven to 425◦F/220◦C degrees. Line two baking sheets with parchment paper.

Preparing batter:
Combine water, butter, salt and sugar in a saucepan over medium heat. Bring to a boil and stir occasionally. At boil, remove from heat and sift in the flour, stirring to combine completely.

Return to heat and cook, stirring constantly until the batter dries slightly and begins to pull away from the sides of the pan.

Transfer to a bowl and stir with a wooden spoon 1 minute to cool slightly.

Add 1 egg. The batter will appear loose and shiny.

As you stir, the batter will become dry-looking like lightly buttered mashed potatoes.

It is at this point that you will add in the next egg. Repeat until you have incorporated all the eggs.

Piping:
Transfer batter to a pastry bag fitted with a large open tip (I piped directly from the bag opening without a tip). Pipe choux about 1 inch-part in the baking sheets. Choux should be about 1 inch high about 1 inch wide.

Using a clean finger dipped in hot water, gently press down on any tips that have formed on the top of choux when piping. You want them to retain their ball shape, but be smoothly curved on top.


Brush tops with egg wash (1 egg lightly beaten with pinch of salt).

Baking:
Bake the choux at 425◦F/220◦C degrees until well-puffed and turning lightly golden in color, about 10 minutes.

Lower the temperature to 350◦F/180◦C degrees and continue baking until well-colored and dry, about 20 minutes more. Remove to a rack and cool.

Can be stored in a airtight box overnight.Filling:
When you are ready to assemble your piece montée, using a plain pastry tip, pierce the bottom of each choux. Fill the choux with pastry cream using either the same tip or a star tip, and place on a paper-lined sheet. Choux can be refrigerated briefly at this point while you make your glaze.

Sunday, May 23, 2010

Banana-Coconut Iceream (Custard) Pie - Tuesdays with Dorie


I want icecream but it's custard for this week - icecream won't survive a trip on the A Train to East New York, where I work, so custard it is. I am using the basic custard recipe Dorie gave us for our earlier TWD Banana Cream Pie, so I'm not deviating too far.

The coconut-butter-shortbread crumbs crust is a keeper. It's quite difficult for me not to eat it as it sits in the fridge, in fact, I have had a couple of crunches. It is delicious!

I've just eaten the props, for breakfast no less. Yum and crunch!

Thank you Spike of Spike Bakes
for this great pick. The recipe and a pic of a beautiful pie filled with chocolate icecream is on Spike's blog... I still want icecream!

Monday, May 17, 2010

Perfection Pound Cake - A TWD Catch-up


I've been browsing through my copy of Dorie Greenspan's book, Baking From My Home to Yours - there are quite a few recipes from our TWD group that I want to catch up on, make-up on or re-try, so this Tuesday it's the Perfection Pound Cake. This was one of the first recipes the group made and it was before I joined; I'm feeling like a nice bit of pound cake, something secure and soothing and relaxing. My dessert catering for Ascension Day reception at my Church went very well last Thursday, but I sure am in need of de-stressing - I made over 200 mini desserts. Pound cake should do the trick.

Perfection Pound Cake

Ingredients:
2 cups all-purpose flour (or 2-1/4 cups cake flour)
1 teaspoon baking powder
1/4 teaspoon salt
2 sticks (8 ounces) unsalted butter, at room temperature
1 cup sugar
4 large eggs, at room temperature
1 teaspoon pure vanilla extract (I also added 1 teaspoon almond extract)

Getting Ready:
Center a rack in the oven and preheat the oven to 325 degrees F. Butter a 9×5-inch loaf pan or an 8-1/2 x 4-1/2-inch loaf pan. Put the pan on an insulated baking sheet or on two regular baking sheets stacked one on top of the other.

Whisk together the flour, baking powder, and salt.

Working with a stand mixer, preferably fitted with a paddle attachment, or with a hand mixer in a large bowl, beat the butter and sugar on high speed until pale and fluffy, a full 5 minutes. Scrape down the bowl and beater and reduce the mixer speed to medium. Add the eggs one at a time, beating for 1 to 2 minutes after each egg goes in. As you’re working, scrape down the bowl and beater often. Mix in the vanilla extract. Reduce the mixer speed to low and add the flour, mixing only until it is incorporated – don’t overmix. In fact, you might want to fold in the last of the flour, or even all of it, by hand with a rubber spatula. Scrape the batter into the buttered pan and smooth the top.

Put the cake into the oven to bake, and check on it after about 45 minutes. If it’s browning too quickly, cover it loosely with a foil tent. If you’re using a 9×5 pan, you’ll need to bake the cake for 70 to 75 minutes; the smaller pan needs about 90 minutes. The cake is properly baked when a thin knife inserted deep into the center comes out clean.

Remove the cake from the oven, transfer the pan to a rack and let rest for 30 minutes.

Run a blunt knife between the cake and the sides of the pan and turn the cake out, then turn it right side up on the rack and cool to room temperature.

Storing:
Wrapped well, the cake will keep for 5 to 7 days at room temperature (stale cake is great toasted) or up to 2 months in the freezer.


I baked my pound cake in an 8-1/2" x 4" loaf pan, for about one hour and 20 minutes. It looking quite neat, a bit overly brown for the crust - I should have used the tip about covering it with foil, but I think it will be fine for the office test tomorrow.

I'll whip up some cream and have a super jar of raspberry syrup, which tastes delicious, so I'll have these additions on the side for those who want their cake a bit fancier.

Sunday, April 25, 2010

Scottish Butter Cake - Trial Baking for Reception


Umm .. creme fraiche, fresh blackberries, fresh mint - sounds good. These are the accompaniments, now I just have to make the cake. I had lunch at a really nice restaurant in the West Village last week, Highlands. We ordered Scottish Butter Cake for dessert and I was sold on trying it out for my church reception coming up on May 13th. So this is the prelim.

Next evening - this is such an easy cake to make. Here is the recipe, from mysuncoast.com

Scottish butter cake with raspberries and crème fraiche

6 egg medium organic egg yolks, plus 1 extra for glazing (I used 5 large egg yolks, plus one for glazing)
9oz all-purpose flour, sifted
6 oz granulated sugar
2 pinches of salt
8oz unsalted butter, room temperature

Preheat the oven to 375F
Mix all of the above ingredients in a bowl to form a smooth dough
Butter a 8-10 inch cake tin
Press the dough evenly into the tin
Lighty mark the surface of the dough in a criss-cross using a fork
Glaze the top of the cake using the extra egg yolk
Place the cake in the oven and bake for 15 minute
Turn the oven down to 325F and bake for a further 10 minutes
Remove the cake and let it cool for 10 minutes before tuning out

Serve with a dollop of crème fraiche and raspberries (blackberries here).

I followed the baking times and oven temps exactly and the cake turned out very well. The only difference from the recipe is I whipped the butter for a short while in my KitchenAid (maybe just over a minute) so it was easy to incorporate with the other ingredients.

The results were delicious. I'll definitely make this for the reception but I'll just leave out the mint - it seems to have collapsed in its travels from home to work.

Saturday, April 17, 2010

Maamoul


I had a really good time over the weekend, what with brunch on Sunday at St. Andrews Restaurant on W. 46th St. NY, and the making of Maamoul, a delicious, exotic Middle Eastern pastry filled with dates (or pistachios or walnuts). I got all the necessary ingredients at Sahadi's - semolina flour, dates, rose water, and orange water and purchased a wooden maamoul mold there as well.

It's my first Middle Eastern pastry venture so the whole process was quite new, what with using semolina flour and the maamoul mold. The first part, mixing the dough, is pretty easy; it becomes a bit finicky once one has to stuff and shape the cookie in the mold.

This is the recipe I used;it's from Gourmet Sleuth:

Basic Mamoul Recipe
I N G R E D I E N T S
1/2 cup solid shortening
8 tablespoons or 4 ounces butter
1 cup flour, all purpose
2 cups semolina
1/4 teaspoon salt
1/4 teaspoon baking power
1/4 cup granulated sugar
1 tablespoon rose flower water and
1 tablespoon orange flower water
7 tablespoons water
walnut, pistachio or date filling
confectioners sugar

I N S T R U C T I O N S
Do not expect the dough to be cohesive but it will be damp enough to form into balls to pack into the cookie molds. This recipe needs to be started a day ahead.

Melt shortening and butter together or use all butter if you wish a richer cookie. cool slightly. Mix flour, semolina, salt, baking powder and sugar together. Rub melted shortening into dough with fingertips until it is like fine soft meal.

Cover bowl and let it rest overnight. Combine flower waters with 7 tablespoons water and sprinkle over the dough. Toss lightly with a fork to distribute liquid evenly. Mix until just combined, like pie dough. (another person says to knead the dough well).

Dust maamoul molds well with flour. Invert and tap gently to remove excess flour. Estimate the amount of dough need to fill maamoul mold and make a ball of dough. Flatten it out slightly and place a good tablespoon of filling in center. Close dough around filling to cover it. Pack ball into mold. Level off cookie even with the lip of the mold. Be sure you have not revealed filling or it will stick to the pan as it bakes.

Tap cookies out onto the work area with a sharp firm hit to the top of the mold. Transfer cookies to baking sheet with a spatula. Bake at 350 F until slightly brown around the edge (about 25 minutes). Cool.
Sprinkle with confectioners sugar before serving.


The oven temperature and baking time are adjustments I made; the recipe recommended far too short a time.

I'm rather delighted with them; now it's onward to nut-filled maamoul.

I checked out a lot of recipes and information on this cookie.Phoenician Gourmet is the best, with very clear instructions, realistic baking times, and fascinating information about the tradition of this delightful cookie.

Tuesday, April 13, 2010

Swedish Visiting Cake - Tuesdays with Dorie


Delightful! I can't wait to have a slice tomorrow. Rushed home from work, expecting to have to make a lot of effort in meeting my Tuesday with Dorie deadline. Instead, the Swedish Visiting Cake was so quick and easy to get together. It's a perfect cake for visitors - one could just about make it while getting coffee for them.

I don't have a cast iron pan so decided to bake it in an 8-inch square cheesecake pan and cut it in squares. Everything went very smoothly.

Nancy of The Dogs Eat the Crumbs picked this one for us. Thank you, Nancy. It's a lovely recipe. The recipe is on Nancy's blog.

Monday, April 5, 2010

Mocha Walnut Marbled Bundt Cake - Tuesdays with Dorie


Erin of When in Doubt Leave it at 350 has chosen this week's Dorie recipe.

It's such a luscious, thick (but light), battery cake to make and there's lots of it. The preparation is quite straightforward, using the standard creaming method. The chocolate coloring and flavoring is the real gooey, chocolate thing, made with butter, coffee, and bittersweet chocolate chips - so much more sophisticated than the marble cake of my childhood, which consisted of blobs of vanilla, cocoa and rose pink batter. (Not that it wasn't nice at the time but it's definitely vintage now.)

What's in the oven now is my second attempt - this time in another pretty bundt pan, slightly larger than the one I used the first time and also stick resistant. Last night I used my regular tin bundt pan (9 inch) - the cake rose beautifully but horror of horrors, when I tried to turn it out the whole thing broke apart. No, not even a chance of rescuing it, unless one wanted to make marbled chocolate trifle. After the breakage experience, I stopped by Cooks'Companion in Brooklyn (delightful store on Atlantic Avenue) and bought a can of Bakers' Joy. I sprayed the inside of the pan liberally. Here's keeping my fingers crossed.

Happiness! The cake came out of the pan beautifully and awaits a dribbling of chocolate ganache then it will be ready for its pic. Thank you, Bakers' Joy, thank you, thank you. This is the way to go for bundt cakes in future.

Check out Erin's blog for the recipe and some beautiful baking.

Sunday, March 28, 2010

Coconut Tea Cake - Tuesdays with Dorie


A pretty cake in a pretty kugelhopf pan. I think some of my crust came off when I turned the cake out (maybe adding flour to the pan as well as shortening would have prevented this), but with some confectioner's sugar drizzle, it should be just fine tomorrow.

I gather it's really a hot milk sponge cake. It was delightful to make, just watching the sugar and egg mixture puff up and peeking through the oven window to see the cake rising gradually. I have a feeling it's going to be good - will see how they like it at the office tomorrow. It's nice to have a run of cakes for the next few weeks - we have had lots of cookies and tarts in TWD lately but we haven't baked a cake in a while.

Carmen of Carmen Cooks picked this week's recipe for us - it's a very nice recipe, Carmen. Thank you.

Monday, March 22, 2010

The Conquest of Frilly Tarts

.


Yippee! Finally! I've figured out a way to get pate sucre tart shells out of frilly tart tins. I have tried many methods and usually end up with about 1/3 of the tarts wasted as they crumble horribly.

So now, here's the method (thanks to Rose Levy Berenbaum, who recommended it). Once the tartlet is baked and removed from the oven, while it is still pretty hot (I mean almost finger-burning hot) stick the eye-end of a sewing or embroidery needle in between the metal and the middle of each flute. Push the needle all the way down to the base of the tin. Pic attached (a terrible pic, I am sorry to say, but it's supposed to be a needle in the middle of a flute). Give each flute the same treatment; when all flutes are done, just gently turn the tartlet tin upside down and the pastry will come out very easily.

I will have to be in a patient mode to do this but with, say, just a dozen or so tartlets, it will now be possible for me to get almost perfect frilly tartlet shells.

Dulce De Leche Duos - Tuesdays with Dorie


Jody of Beansy Loves Cake has chosen this recipe for us this Tuesday. Another delicious Dorie Greenspan cookie recipe, and so easy to put together. I bought some Dulce de Leche at Sahadi's, which was made in Argentina. It has a light coffee flavor and is difficult not to eat by the spoonful.


The cookies keep their shape beautifully while baking - a heaping teaspoon full of dough rolled into balls gives a nice size of cookie. I didn't stint on the filling and as I type am enjoying a Duo, filled with decadent toffee coffee spread. Lovely recipe - definitely a "Make Again."

Thank you for this nice pick, Jodie.